ConfigMgr Built-in Security Roles

I needed a list of the built-in security roles in System Center Configuration Manager, but couldn’t find a list in the Microsoft documentation.  The roles and descriptions can be found in the Configuration Manager console under Administration > Security > Security Roles.

This list is a compilation of the roles listed in the console as of Current Branch 1806.


Application Administrator
Grants permissions to perform both the Application Deployment Manager role and the Application Author role. Administrative users who are associated with this role can also manage queries, view site settings, manage collections, edit settings for user device affinity, and manage App-V virtual environments

Application Author
Grants permissions to create, modify, and retire applications. Administrative users who are associated with this role can also manage applications, packages, and App-V virtual environments.

Application Deployment Manager
Grants permissions to deploy applications. Administrative users who are associated with this role can view a list of applications, and they can manage deployments for applications, alerts, templates and packages, and programs. Administrative users who are associated with this role can also view collections and their members, status messages, queries, conditional delivery rules, and App-V virtual environments.

Asset Manager
Grants permissions to manage the Asset Intelligence Synchronization Point, Asset Intelligence reporting classes, software inventory, hardware inventory, and metering rules.

Company Resource Access Manager
Grants permissions to create, manage and deploy company resource access profiles such as Wi-Fi, VPN, Exchange ActiveSync email, and certificate profiles to users and devices.

Compliance Settings Manager
Grants permissions to define and monitor Compliance Settings. Administrative users associated with this role can create, modify, and delete configuration items and baselines. They can also deploy configuration baselines to collections, and initiate compliance evaluation, and initiate remediation for non-compliant computers.

Endpoint Protection Manager
Grants permissions to define and monitor security policies. Administrative Users who are associated with this role can create, modify and delete Endpoint Protection policies. They can also deploy Endpoint Protection policies to collections, create and modify Alerts and monitor Endpoint Protection status.

Full Administrator
Grants all permissions in Configuration Manager. The administrative user who first creates a new Configuration Manager installation is associated with this security role, all scopes, and all collections.

Infrastructure Administrator
Grants permissions to create, delete, and modify the Configuration Manager server infrastructure and to perform migration tasks.

Operating System Deployment Manager
Grants permissions to create operating system images and deploy them to computers. Administrative users who are associated with this role can manage operating system upgrade packages and images, task sequences, drivers, boot images, and state migration settings.

Operations Administrator
Grants permissions for all actions in Configuration Manager except for the permissions that are required to manage security, which includes managing administrative users, security roles, and security scopes.

Read-only Analyst
Grants permissions to view all Configuration Manager objects.

Remote Tools Operator
Grants permissions to run and audit the remote administration tools that help users resolve computer issues. Administrative users that are associated with this role can run Remote Control, Remote Assistance and Remote Desktop from the Configuration Manager console. In addition, they can run the Out of Band Management console and AMT power control options.

Security Administrator
Grants permissions to add and remove administrative users and to associate administrative users with security roles, collections, and security scopes. Administrative users who are associated with this role can also create, modify, and delete security roles and their assigned security scopes and collections.

Software Update Manager
Grants permissions to define and deploy software updates. Administrative users who are associated with this role can manage software update groups, deployments, and deployment templates.

Posted in Uncategorized | Leave a comment

Installing Baikal on Debian 9 with Nginx and MySQL

The following are the steps I used to install Baikal CalDAV / CardDAV server on Debian 9 stretch using Nginx and MySQL.  This setup was for a lab environment.

Install Prerequisites

apt-get install nginx mysql-server php-fpm php-mysql php-sabre-dav git

Start PHP-FPM

service php7.0-fpm start

Set PHP-FPM to always start on boot

systemctl enable php7.0-fpm

Configure Nginx

Backup the default config file

​​cp /etc/nginx/sites-available/default /etc/nginx/sites-available/default.backup

Create a new config file

nano /etc/nginx/sites-available/default

Replace all text with the following

server {
  listen 80;
  server_name _;

  root /var/www/html/baikal/html;
  index index.php;

  rewrite ^/.well-known/caldav /dav.php redirect;
  rewrite ^/.well-known/carddav /dav.php redirect;

  charset utf-8;

  location ~ /(\.ht|Core|Specific) {
    deny all;
    return 404;
  }

  location ~ ^(.+\.php)(.*)$ {
    try_files $fastcgi_script_name =404;
    include /etc/nginx/fastcgi_params;
    fastcgi_split_path_info ^(.+\.php)(.*)$;
    fastcgi_pass unix:/var/run/php/php7.0-fpm.sock;
    fastcgi_param SCRIPT_FILENAME $document_root$fastcgi_script_name;
    fastcgi_param PATH_INFO $fastcgi_path_info;
  }
}


Start nginx

service nginx start

Set nginx to always start on boot

systemctl enable nginx

Creating the MySQL database

Log into MySQL

myqsl -u root -p

Create the Baikal database

create database baikal;

Create a user for the database

create user 'baikaluser'@'localhost' identified by 'baikalPass';

Grant permissions to the database for the created user

grant all on baikal.* to 'baikaluser'@'localhost';

Install Baikal

Clone the repository to the document root

git clone https://github.com/sabre-io/baikal.git /var/www/html

Set permissions for the web user

chown -R www-data:www-data /var/www/html/baikal

Start nginx

service nginx start

Configure Baikal

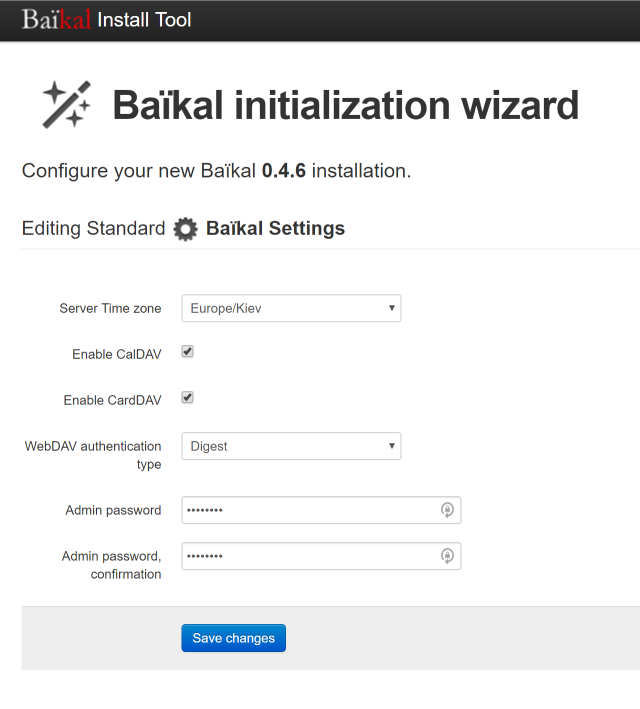
You can being configuring Baikal at http://YOURSERVER/admin/install/

2017-12-20 19_48_58-Baïkal Maintainance.png

2017-12-20 19_50_16-Baïkal Maintainance.png

2017-12-20 19_52_50-Baïkal Maintainance.png

2017-12-20 19_53_09-Baïkal 0.4.6 Web Admin.png

2017-12-20 19_54_41-Baïkal 0.4.6 Web Admin.png

Posted in linux | Leave a comment

Migrating from Windows Internal Database (WID) to External SQL (WSUS 4 on Server 2016)

The following are the steps I used to migrate from a WSUS 4 Windows Internal Database on Server 2016 to SQL Server 2016 hosted on another Windows Server 2016 server.

First, stop the WSUS and IIS Admin services

Stop-Service -Name "IISADMIN"
Stop-Service -Name "WsusService"

Install SQL Server Management Studio

Open SSMS (Run as Administrator) and for Server Name, use \\.\pipe\Microsoft##WID\tsql\query

345235462345234

Run the query:

alter database SUSDB set single_user with rollback immediate
exec sp_detach_db 'SUSDB'

Now move the SUSDB files from C:\WINDOWS\WID\Data to the new SQL Server in “C:\Program Files\Microsoft SQL Server\MSSQL13.MSSQLSERVER\MSSQL\DATA” and attach them with SQL Server Management Studio.

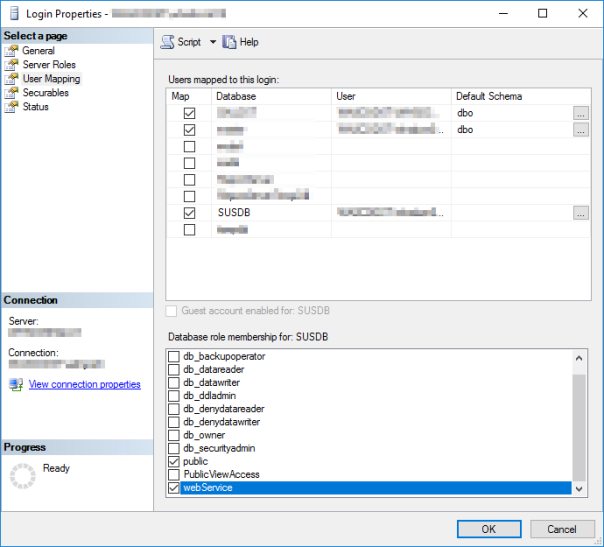
Make sure the WSUS server account is listed under Security/Logins if not create it. Map the login to the SUSDB under “User Mappings” and give it the “webService” role.

3456568467832


On the WSUS Server change the registry entry at “HKEY_LOCAL_MACHINE\SOFTWARE\Microsoft\UpdateServices\Server\Setup\SqlServerName” to reflect the name of the new SQL Server.

Start the services

Start-Service -Name "IISADMIN"
Start-Service -Name "WsusService"


The WID Database feature can now be removed from the WSUS server.

Uninstall-WindowsFeature -Name Windows-Internal-Database


Posted in Uncategorized | Leave a comment

ConfigMgr – Find Package or Deployment Name by ID

The following SQL will allow you to find the package or deployment name based on the Deployment ID/Offer ID.

SELECT CollectionID
 ,OfferID
 ,Description
 FROM DeploymentSummary
 WHERE OfferID = 'PKG00000'

Where PKG00000 is the ID of the deployment you’re trying to find.


Posted in Uncategorized | Leave a comment

ConfigMgr 1606 Move Database from SQL 2008 to SQL 2016 on separate server

The following steps are how I moved an existing Windows Server 2008 R2/SQL 2008 ConfigMgr database residing on the site server to a separate standalone install on Windows Server 2016/SQL 2016.

Install SQL 2016, only “Database Engine Services” and “Reporting Services – Native” need to be installed.

If you start your SQL services as a domain user, you will need to register the SPNs for the user.  Use setspn for this using both the NetBIOS name and FQDN of the SQL Server

setspn -a MSSQLSvc/SERVERNAME:1433 wascodst\SMSAdmin
setspn -a MSSQLSvc/SERVERNAME.DOMAIN.COM:1433 wascodst\SMSAdmin

On the new SQL Server open the ports for SQL and WMI between the site server and the new SQL server.

New-NetFirewallRule -DisplayName "SQL Server TCP 1433" -Direction Inbound –LocalPort 1433 -Protocol TCP -Action Allow -RemoteAddress "SITESERVERIP"
New-NetFirewallRule -DisplayName "SQL Server TCP 4022" -Direction Inbound –LocalPort 4022 -Protocol TCP -Action Allow -RemoteAddress "SITESERVERIP"
Set-NetFirewallRule -DisplayName "Windows Management Instrumentation (WMI-In)" -Enabled true -RemoteAddress "SITESERVERIP"

Next, add the computer account of the ConfigMgr Site Server to the Administrators group on the new SQL 2016 server.

The Common Language Runtime (CLR) needs to be enabled on the SQL Server. In SQL Management Studio, run the following:

sp_configure 'clr enabled',1
reconfigure

You will also need to create a self-signed certificate on the SQL server for secure communication, you can do this with PowerShell.

New-SelfSignedCertificate -DnsName FQDN.DOMAIN.COM -CertStoreLocation cert:\LocalMachine\My -FriendlyName SQLServerCert -KeySpec KeyExchange -NotAfter $(Get-Date).AddYears(+10)

This will create a self-signed certificate with an expiration of 10 years.

Open SQL Server Configuration Manager and under SQL Server Network Configuration, Properties, Certificate tab, select the newly-created certificate.

2017-03-14 09_54_5 - VMware Remote Console

Now restart the SQL Service.

This certificate will also need to be added to the ConfigMgr site server.

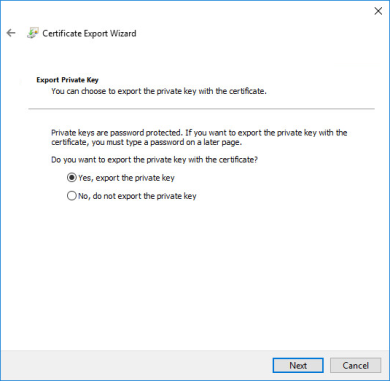
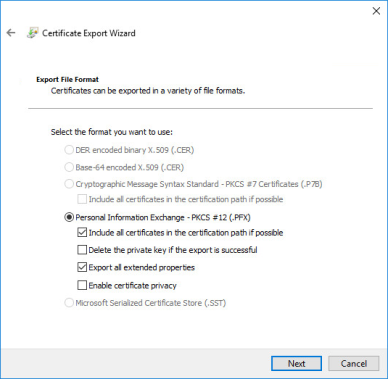
Open the Certificates MMC and export the certificate from Local Computer\Personal Certificates store.

3457885678

23452476545674567

Transfer the certificate to the ConfigMgr site server and import it to the Trusted Root Certification Authorities store.

Importing the certificate corrects an error you might see in C:\ConfigMgrSetup.log during the database move. Those errors would be:

***Failed to connect to the SQL Server, connection type: SMS ACCESS.
INFO: SQL Connection failed. Connection: SMS ACCESS, Type: Secure
*** [08001][-2146893019][Microsoft][SQL Server Native Client 11.0]SSL Provider: the certificate chain was issued by an authority that is not trusted.
*** [08001][-2146893019][Microsoft][SQL Server Native Client 11.0]Client unable to establish connection

456346745874768

The next step is to stop the site services on the site server:

C:\Program Files\Microsoft Configuration Manager\bin\x64\00000409\preinst.exe /stopsite

Now take a backup of the SQL database for the site server. Right-click the Database in SSMS and select All Tasks, Backup.

2354634673

Once the backup is complete, move this file to the destination SQL server, open up SSMS and Restore the Database.

On the destination SQL Server, a few options will need to be turned back on after restoring, run the following query:

ALTER DATABASE dbname SET ENABLE_BROKER
ALTER DATABASE dbname SET TRUSTWORTHY ON
ALTER DATABASE dbname SET HONOR_BROKER_PRIORITY ON;

Where dbname is your restore ConfigMgr SQL database.

To verify that the options were turned on successfully, you can run:

select is_trustworthy_on, is_broker_enabled, is_honor_broker_priority_on from sys.databases where name = 'dbname'

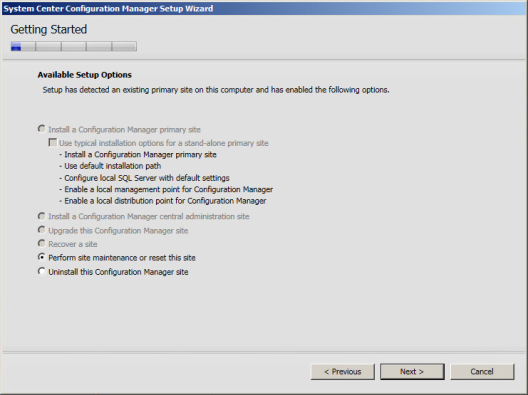
To complete the move, we need to go back to the ConfigMgr site server and run ConfigMgr Setup from the Start Menu.

Choose Site Maintenance

7689678945623

Choose Modify SQL Server Configuration

31452363467428

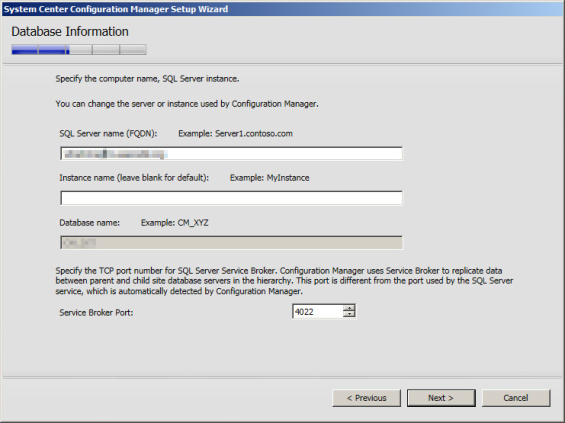
And set the FQDN of your new SQL server install

213413466458357

If that is successful, your database should now be operational.

Note: I encountered an issue where I was getting the following error after running site maintenance to move the database:

ERROR: Failed to find the file C:\Program Files\Microsoft Configuration Manager\CMUStaging\0D256560-ED2C-45B5-8D75-4D38AB3F758C\redist\msxml6_x64.msi

I fixed this by creating the folder:

mkdir "C:\Program Files\Microsoft Configuration Manager\CMUStaging\0D256560-ED2C-45B5-8D75-4D38AB3F758C\redist"

Then re-downloading the prerequisite files with:

C:\Program Files\Microsoft Configuration Manager\bin\x64\setupdl.exe

Then copying them to the folder created above.

Posted in Uncategorized | Leave a comment

Windows 10 and SMART Notebook 11.4

While attempting to install SMART Notebook 11.4 on a base install of Windows 10, my install kept rolling back after reaching Step 4 of 6 (Publishing Product Information)

After turning on MSI logging for the installation, I saw the following errors in the log file:

CAQuietExec:  Microsoft (R) CLR Native Image Generator - Version 4.6.79.0
CAQuietExec:  Copyright (c) Microsoft Corporation.  All rights reserved.
CAQuietExec:  1>    Compiling assembly System.Data.SqlXml, Version=4.0.0.0, Culture=neutral, PublicKeyToken=b77a5c561934e089 (CLR v4.0.30319) ...
CAQuietExec:  1>Error compiling System.Data.SqlXml, Version=4.0.0.0, Culture=neutral, PublicKeyToken=b77a5c561934e089: Windows cannot verify the digital signature for this file. A recent hardware or software change might have installed a file that is signed incorrectly or damaged, or that might be malicious software from an unknown source. (Exception from HRESULT: 0x80070241)
CAQuietExec:  1>Ngen failed to generate native code for image System.Data.SqlXml, Version=4.0.0.0, Culture=neutral, PublicKeyToken=b77a5c561934e089 because of the following error: Windows cannot verify the digital signature for this file. A recent hardware or software change might have installed a file that is signed incorrectly or damaged, or that might be malicious software from an unknown source. (Exception from HRESULT: 0x80070241)
CAQuietExec:  1>Ngen will retry compilation of image System.Data.SqlXml, Version=4.0.0.0, Culture=neutral, PublicKeyToken=b77a5c561934e089
CAQuietExec:  1>    Compiling assembly System.Data.SqlXml, Version=4.0.0.0, Culture=neutral, PublicKeyToken=b77a5c561934e089 (CLR v4.0.30319) ...
CAQuietExec:  1>Error compiling System.Data.SqlXml, Version=4.0.0.0, Culture=neutral, PublicKeyToken=b77a5c561934e089: Windows cannot verify the digital signature for this file. A recent hardware or software change might have installed a file that is signed incorrectly or damaged, or that might be malicious software from an unknown source. (Exception from HRESULT: 0x80070241)
CAQuietExec:  1>Failed to generate native code for dependent image System.Data.SqlXml, Version=4.0.0.0, Culture=neutral, PublicKeyToken=b77a5c561934e089 because of the following error: Windows cannot verify the digital signature for this file. A recent hardware or software change might have installed a file that is signed incorrectly or damaged, or that might be malicious software from an unknown source. (Exception from HRESULT: 0x80070241)
CAQuietExec:  1>    Compiling assembly System.Security, Version=4.0.0.0, Culture=neutral, PublicKeyToken=b03f5f7f11d50a3a (CLR v4.0.30319) ...
CAQuietExec:  1>Error compiling System.Security, Version=4.0.0.0, Culture=neutral, PublicKeyToken=b03f5f7f11d50a3a: Windows cannot verify the digital signature for this file. A recent hardware or software change might have installed a file that is signed incorrectly or damaged, or that might be malicious software from an unknown source. (Exception from HRESULT: 0x80070241)
CAQuietExec:  1>Ngen failed to generate native code for image System.Security, Version=4.0.0.0, Culture=neutral, PublicKeyToken=b03f5f7f11d50a3a because of the following error: Windows cannot verify the digital signature for this file. A recent hardware or software change might have installed a file that is signed incorrectly or damaged, or that might be malicious software from an unknown source. (Exception from HRESULT: 0x80070241)
CAQuietExec:  1>Ngen will retry compilation of image System.Security, Version=4.0.0.0, Culture=neutral, PublicKeyToken=b03f5f7f11d50a3a
CAQuietExec:  1>    Compiling assembly System.Security, Version=4.0.0.0, Culture=neutral, PublicKeyToken=b03f5f7f11d50a3a (CLR v4.0.30319) ...
CAQuietExec:  1>Error compiling System.Security, Version=4.0.0.0, Culture=neutral, PublicKeyToken=b03f5f7f11d50a3a: Windows cannot verify the digital signature for this file. A recent hardware or software change might have installed a file that is signed incorrectly or damaged, or that might be malicious software from an unknown source. (Exception from HRESULT: 0x80070241)
CAQuietExec:  1>Failed to generate native code for dependent image System.Security, Version=4.0.0.0, Culture=neutral, PublicKeyToken=b03f5f7f11d50a3a because of the following error: Windows cannot verify the digital signature for this file. A recent hardware or software change might have installed a file that is signed incorrectly or damaged, or that might be malicious software from an unknown source. (Exception from HRESULT: 0x80070241)
CAQuietExec:  1>    Compiling assembly System.Numerics, Version=4.0.0.0, Culture=neutral, PublicKeyToken=b77a5c561934e089 (CLR v4.0.30319) ...
CAQuietExec:  1>Error compiling System.Numerics, Version=4.0.0.0, Culture=neutral, PublicKeyToken=b77a5c561934e089: Windows cannot verify the digital signature for this file. A recent hardware or software change might have installed a file that is signed incorrectly or damaged, or that might be malicious software from an unknown source. (Exception from HRESULT: 0x80070241)
CAQuietExec:  1>Ngen failed to generate native code for image System.Numerics, Version=4.0.0.0, Culture=neutral, PublicKeyToken=b77a5c561934e089 because of the following error: Windows cannot verify the digital signature for this file. A recent hardware or software change might have installed a file that is signed incorrectly or damaged, or that might be malicious software from an unknown source. (Exception from HRESULT: 0x80070241)

CAQuietExec:  1>Error compiling System.Windows.Forms, Version=4.0.0.0, Culture=neutral, PublicKeyToken=b77a5c561934e089: Windows cannot verify the digital signature for this file. A recent hardware or software change might have installed a file that is signed incorrectly or damaged, or that might be malicious software from an unknown source. (Exception from HRESULT: 0x80070241)
CAQuietExec:  1>Ngen failed to generate native code for image System.Windows.Forms, Version=4.0.0.0, Culture=neutral, PublicKeyToken=b77a5c561934e089 because of the following error: Windows cannot verify the digital signature for this file. A recent hardware or software change might have installed a file that is signed incorrectly or damaged, or that might be malicious software from an unknown source. (Exception from HRESULT: 0x80070241)
CAQuietExec:  1>Ngen will retry compilation of image System.Windows.Forms, Version=4.0.0.0, Culture=neutral, PublicKeyToken=b77a5c561934e089
CAQuietExec:  1>    Compiling assembly System.Windows.Forms, Version=4.0.0.0, Culture=neutral, PublicKeyToken=b77a5c561934e089 (CLR v4.0.30319) ...
CAQuietExec:  1>WARNING: Dependency attribute for System.Drawing, is being ignored, possibly because of cyclic dependencies.
CAQuietExec:  1>Error compiling System.Windows.Forms, Version=4.0.0.0, Culture=neutral, PublicKeyToken=b77a5c561934e089: Windows cannot verify the digital signature for this file. A recent hardware or software change might have installed a file that is signed incorrectly or damaged, or that might be malicious software from an unknown source. (Exception from HRESULT: 0x80070241)
CAQuietExec:  1>Failed to generate native code for dependent image System.Windows.Forms, Version=4.0.0.0, Culture=neutral, PublicKeyToken=b77a5c561934e089 because of the following error: Windows cannot verify the digital signature for this file. A recent hardware or software change might have installed a file that is signed incorrectly or damaged, or that might be malicious software from an unknown source. (Exception from HRESULT: 0x80070241)
CAQuietExec:  Windows cannot verify the digital signature for this file. A recent hardware or software change might have installed a file that is signed incorrectly or damaged, or that might be malicious software from an unknown source. (Exception from HRESULT: 0x80070241)
CAQuietExec:  Error 0xffffffff: Command line returned an error.
CAQuietExec:  Error 0xffffffff: CAQuietExec Failed
CustomAction Launch_ngen_Quietly returned actual error code 1603 (note this may not be 100% accurate if translation happened inside sandbox)

After installing Cumulative Update for Windows 10 for x64-based Systems (KB3105210) installation of SMART Notebook 11.4 was successful.

Posted in Uncategorized | Leave a comment

Windows 10 – Start Menu Customization

I wanted to customize the Windows 10 Start Menu so that it had a standard interface for all new users. There is a GPO that can do this, however it also locks the user out from pinning their own programs to the Start Menu, which wouldn’t be workable in my case.

To create a standard Start Menu interface that can be customized, you first need to customize a dummy account’s Start Menu the way you’d like it. Once all of the programs are pinned and sized the way you’d like them, in PowerShell run:

Export-StartLayout -Path C:\LayoutModification.xml

This file needs to be copied to C:\Users\Default\AppData\Local\Microsoft\Windows\Shell

Since I copy this customization as part of a Configuration Manager Task Sequence, I use the following PowerShell:

Copy-Item "LayoutModification.xml" `
 -Destination "$env:SystemDrive\Users\Default\AppData\Local\Microsoft\Windows\Shell"

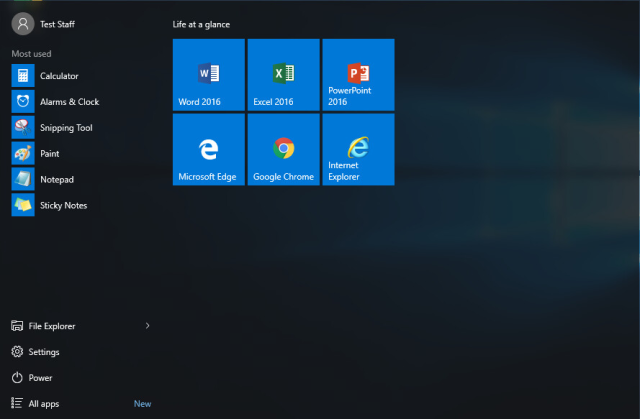
Any new users logging in to the workstation should now receive a customized Start Menu.

2015-10-28 08_35_31-win7-test-02 on 172.27.53.214

Posted in Uncategorized | Leave a comment

Windows 10 – Remove Modern Apps

While building a Windows 10 Image with Configuration Manager, I wanted to be able to remove most Windows 10 Modern (Metro) apps, yet keep a handful of them.

I wanted to keep the Modern apps for “Alarms & Clock”, “Calculator”, “Camera”, “Photos”, and “Voice Recorder”.

As a part of the final steps of my Task Sequence I ran the following PowerShell (as Administrator) which will uninstall Modern apps for all NEW users logging in to the PC:

Get-AppxProvisionedPackage -Online `
| Where-Object {$_.PackageName -NotMatch "alarms|camera|calculator|photos|soundrecorder|windowsstore"} `
| Remove-AppxProvisionedPackage -Online
Posted in Uncategorized | Leave a comment

Office 2016 KMS Activation

If you’re installing on Windows Server 2008 R2, make sure you have KB2757817 installed. http://support.microsoft.com/kb/2757817

First the Office 2016 Volume License Pack needs to be downloaded at http://www.microsoft.com/en-us/download/details.aspx?id=49164

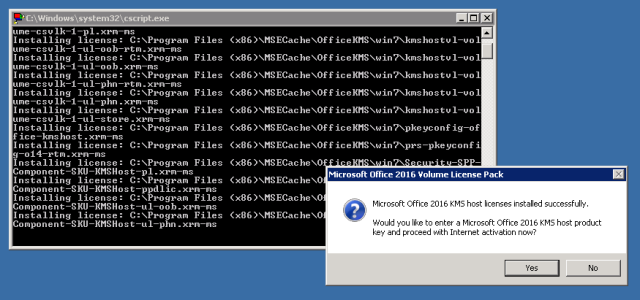
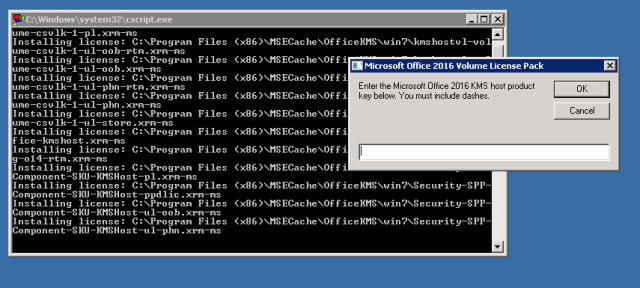
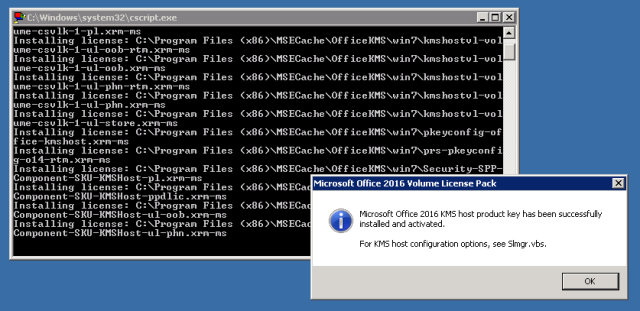
After installation, the installer will prompt for the product key and to set up the Volume Activation Tool.

2015-10-06 08_56_29-mRemoteNG - confCons.xml

2015-10-06 08_59_03-mRemoteNG - confCons.xml

Add the KMS license key and activate.

2015-10-06 09_00_21-mRemoteNG - confCons.xml

You will need a minimum of 5 clients before the KMS host will begin handing out activation keys.

To manage activations, you can download the Volume Activation Management Tool (VAMT) 3.0 here: http://go.microsoft.com/fwlink/p/?LinkId=526740

*Note:  VAMT 3.1 (Windows 8.1 & 10 ADK) is not supported on Windows 7 or Windows Server 2008 R2.

Posted in Uncategorized | 1 Comment

Disable Adobe Sign In Prompt – Acrobat Pro DC

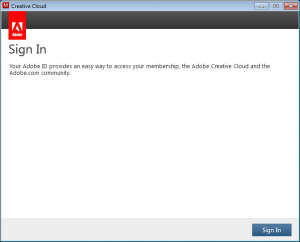
After using Adobe Creative Cloud Packager to package Acrobat Pro DC for installation, I noticed that I would receive an Adobe Sign In prompt every time I launched the program.

2015-04-15 08_26_59-win7-test-02 on 172.27.53.214

Acrobat Pro DC was installed as part of a Creative Cloud package that only contained Acrobat Pro DC, no other products were installed alongside it.  Further testing showed that this prompt would disappear if I did install another CC product alongside Acrobat DC, such as Photoshop CC.  This suggested to me that Acrobat DC might not be licensed correctly.

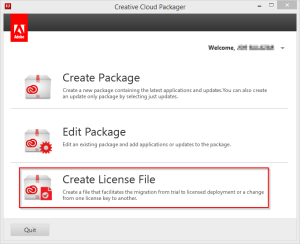
Ultimately I fixed the issue by using the “Create License File” option in Creative Cloud Packager.

2015-04-16 10_05_23-Creative Cloud Packager

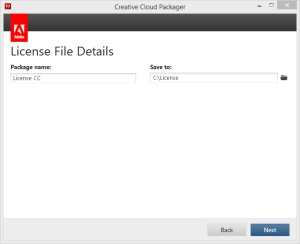
Create the package and choose a location to save it to.

2015-04-16 10_07_00-Creative Cloud Packager

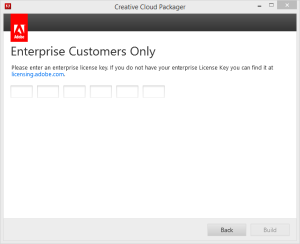
Then enter the Enterprise License Key.

2015-04-16 10_07_18-Creative Cloud Packager

This process will create a folder containing some files and an executable named “AdobeSerialization.exe”.  If you run this executable after installation of Acrobat Pro DC, it should properly license the product and stop the “Adobe Sign In” prompts.

The following batch file will install Acrobat Pro DC that’s been packaged using Creative Cloud Packager.

@echo off
exceptions\ExceptionDeployer.exe --workflow=install --mode=pre --installLanguage=en_US
msiexec /i "build\Adobe Acrobat x64.msi" /l*v "install.log" /qn
exceptions\ExceptionDeployer.exe --workflow=install --mode=post --installLanguage=en_US
license\AdobeSerialization.exe
Posted in Uncategorized | Leave a comment